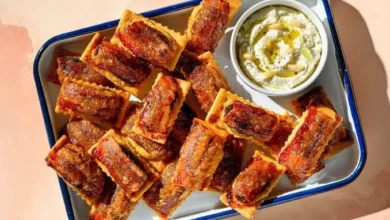
Kickin’ Brisket Pepper Jam for Burgers and Sandwiches
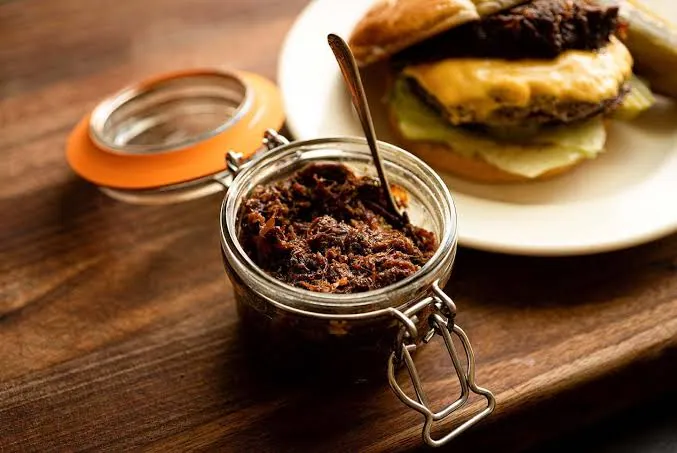
Burgers can get boring with the same old ingredients like lettuce, tomato and pickles. Sometimes you just need a change to switch things up. A great use for any brisket leftovers is as the ultimate burger topping – brisket jam. Making brisket jam is super easy and the flavors are incredibly deep. Just simmer down your leftover brisket with some bacon, brown sugar, ketchup, cider vinegar and Worcestershire sauce. The process concentrates all the savory meatiness of the brisket into a thick, spreadable concoction.
If you’re a fan of bacon jam, I think you’ll love brisket jam just as much. The combination of sweet and savory is almost addictive. Instead of the usual veggies, pile a good spoonful of the jam onto your burger bun. The deep, rich flavors of the brisket really shine through. It elevates a regular burger into something truly special. Forget pickles – brisket jam is the new must-have burger topping! I’ve found that brisket jam takes burgers to the next level.
Contents
- Brisket Jam
- Preparing Bacon for Jam: Tips and Techniques
- Preparing Grilled Jalapeños for Dicing
- Dicing Onions for Consistent Texture
- Chopping Cooked Bacon for Bacon Jam
- Sauté the Onions & Garlic
- Creating Savory Brisket Jam: A Flavorful Fusion
- Versatile Uses of Brisket Jam
- Nutritional Information (Per Serving)
- How to Make a Brisket Jam Burger?
- Storing and Reheating
- Frequently Asked Questions (FAQs)
- Brisket Jam
Brisket Jam
Brisket jam is a unique, savory spread that is made from slowly smoked beef brisket. The brisket is first slowly smoked until tender, then simmered with onions and combined with vinegars, spices, and other seasonings. The result is a thick, jam-like mixture with a rich, concentrated beef flavor from the slow smoking process. Small pieces of the tender brisket meat are suspended throughout the sweet and tangy sauce.
As a Texas-style condiment, brisket jam takes advantage of smoked brisket, which is one of the signature barbecue meats of the Lone Star State. It captures the smoky essence of perfect barbecue and brings it in a spreadable form. Brisket jam makes for a delicious accompaniment to crackers, breads and veggie plates. The blend of spicy, sour and meaty flavors makes brisket jam the perfect party appetizer and addition to barbecue sandwiches and platters. Taking inspiration from the barbecue center of America, brisket jam puts a delicious meaty twist on traditional fruit jams.
Preparing Bacon for Jam: Tips and Techniques
For me, cutting the bacon into ~1-inch pieces before cooking has always worked well to render out the fat evenly. However, I prefer to cook the bacon whole in thick slices for a bit more texture in the final jam. For this recipe, I decided to fry the bacon in a 10-inch cast iron skillet, so I could get it somewhere between soft and crispy. In my experience, the end result of slightly firm but not fully crispy bacon works best in this application. It’s also important to remember that bacon will keep cooking for a minute or two after removing from the pan. Once the bacon was finished, I removed it from the pan along with a couple tablespoons of the rendered bacon grease to use later in the recipe. Seeing how the bacon turns out is certainly a tasty part of the process!
Preparing Grilled Jalapeños for Dicing
Once the bacon was ready to be removed from the pan, I turned my attention to preparing the jalapeños. For this part, I like to place a small cast iron grill grate over medium-high heat on the stove top. Then I place the jalapeños directly on the grate, so their skins can get blackened while turning them occasionally. In my experience, fully blackening the sides is key for easy removal of the skins later.
Once the skins are nicely charred, I slice off the stem end of each pepper and remove the seeds and inner membranes. At this point, the skins are very easy to peel off the flesh. From there, it’s simply a matter of dicing the roasted pepper flesh. It’s a small step but worth the few extra minutes of work. Next up is combining all the flavors into the richest savory spread.
Dicing Onions for Consistent Texture
When it comes to the onions for this recipe, I generally prefer dicing rather than chopping. While chopping creates various irregularly shaped pieces of onion, dicing results in nice, neat little cubes. However, I do quite like the extra texture variation that chopping can provide in some recipes. For brisket jam though, I’ve found it best to go with dicing for a slightly more consistent texture throughout.
The onion I used was somewhere between medium and large, not quite the volume of a softball but close. Yellow onions are particularly sweet and caramelize really well in this application. But if all you have is a large bag of red or white onions, then those will work just fine as well. I find dicing the onion into roughly 1⁄4 inch cubes provides a nice balance of presence in each bite of jam without being overwhelming. And with that, the central vegetable components are prepared – time to start building layers of flavor!
Chopping Cooked Bacon for Bacon Jam
Moving right along, it was now time to tackle chopping the cooked bacon. For this step, I gathered the strips of cooked bacon and piled them up on a cutting board. Then I grabbed my largest, sharpest knife to commence chopping the bacon into smaller, random pieces. By chopping rather than dicing, this process gives you a nice pile of bacon in various sizes, ranging from crumbs to pieces around 1⁄4 inch square. Some recipes may call for a more consistent bacon texture, in which case you could stack and carefully cut the bacon strips into evenly sized dice instead of chopping. Either method works well – for this jam I enjoy the extra hit of savory bacon bits throughout.
Sauté the Onions & Garlic
With the major components prepped, it was time to start building layers of flavor in the skillet. Remembering the few tablespoons of bacon fat I had reserved earlier, I returned to the same cast iron pan to sauté the diced onions. Over medium heat, I added a glug of olive oil to the rendered bacon grease and tossed in the diced onions. Within a few minutes, I also stirred in about 1 teaspoon of red pepper flakes to hint at the jam’s eventual complexity. Continuing to cook and stir the mixture until the onions were deeply caramelized and soft all the way through helped develop richness in the base. Each occasional stir released more savory notes to waft up from the pan. Patience at this stage ensures the jam will taste immensely satisfying.
Creating Savory Brisket Jam: A Flavorful Fusion
It was time to start combining all the prepared elements into a cohesive, delicious jam. To the caramelized onion base in the skillet, I added the chopped beef brisket, grilled peppers and bacon bits. Continuing to cook and stir, this mixture allowed the brisket pieces to warm through completely. After just a few more minutes, the brisket edges began to lightly crisp in spots.
Next came a splash each of cider vinegar, maple syrup and brown sugar along with a healthy pour of coffee, and Worchestershire sauce and a few pinches of seasoning. With another vigorous stir to fully incorporate the liquid components, the jam was ready for a simmer. Over the next 10–15 minutes, I stuck close by, stirring often as the mixture reduced and thickened into an irresistible spread.
You’ll know it’s done when a spoon dragged through the jam leaves a trail that stays separated for a few seconds before coming back together in a rich, glossy sauce. Once satisfied with the consistency, I removed the pan from the heat to let the brisket jam cool slightly before use. In that brief rest, it thickened up just a touch more to perfect spreading texture. The wait was surely worth it for that first taste straight off a burger – savory heaven in a pot.
Versatile Uses of Brisket Jam
With the brisket jam finished and cooled, it was time to start enjoying it on all sorts of savory items. Truly, this deeply flavorful condiment is great for bringing a smile to your face in just about any application where an extra bit of umami richness is needed!
Some of my favorite ways to use this special spread include piling it high on hot dogs, burgers, and tacos for immediate bite-induced grins. It also makes an unforgettable topping blended into pizza dough or dolloped onto slices. The rich smokiness of brisket jam pairs perfectly with Ground Pork Smash Burgers and Jalapeño Popper Stuffed Burgers for extra meaty flavor in every bite. On a cheese board, the smoky meatiness of brisket jam is unparalleled – what’s not to love? Even simple toast or crackers are transformed into indulgent nibbles. But perhaps my favorite use is stuffing a cavity carved out of other party meats like kielbasa or smoked chicken before throwing them on the grill. Brisket jam packed into unexpected places always delivers satisfying results. With so many options to explore, this versatile condiment is sure to become a staple in your kitchen.
Nutritional Information (Per Serving)
Here are the nutrition facts for a single serving (2 tablespoons) of brisket jam:
| Nutrition Facts | Calories | Details |
| Fat | 1.5 g | Most of this comes from the bacon fat used to sauté the onions. Overall, it’s a moderate amount. |
| Saturated Fat | 0.5 g | Less than 1 gram per serving keeps saturated fat low. |
| Cholesterol | 20 mg | The small amount of beef and bacon contributes some cholesterol, but not a significant amount. |
| Sodium | 73 mg | The Worcestershire sauce and seasoning add a bit of salt, but the overall sodium level is low. |
| Carbohydrates | 13 g | The maple syrup, brown sugar and onions provide natural sugars, but much comes from fiber too. |
| Fiber | 0.8 g | A nice fiber boost comes from the onions especially. |
| Sugar | 10 g | Maple syrup and brown sugar are listed as the sweet ingredients for flavor. |
| Protein | 7.5 g | Protein comes primarily from the smoked brisket meat used. |
So in summary, a reasonable serving of brisket jam is moderate in calories and fat while supplying flavor, fiber and fill-you-up protein. Not too shabby for such a tasty spread!
How to Make a Brisket Jam Burger?
1. Cooking the burgers:
Now that the brisket jam was made, I couldn’t wait to try it on my favorite brisket jam burger recipe. After forming and seasoning patties to my liking, I carefully placed them onto the hot grill grates. Cooking the burgers over medium-high heat allowed me to keep a close eye on them until they reached an internal temperature of 150 degrees – the perfect doneness for my tastes.
Once cooked through, I couldn’t resist topping each burger patty with a melty slice of aged cheddar cheese before closing the lid to allow it to soften. And while the grill was still scorching hot, I took advantage by placing the brioche buns directly onto the grates. Within just 30 seconds or so, they were perfectly toasted to a golden brown hue.
2. Assembling the burgers:
As promised, the brisket jam packs so much rich, smoky flavor that no other toppings were really needed beyond the essential burger foundation. I spread a touch of mayonnaise on the bottom bun and then layered on the patty, topped with another generous dollop of jam. That first bite truly showcased what this special condiment can do for elevating the familiar burger into an unforgettable food memory. Decadent is an understatement – it’s simply bursting with Texas barbecue soul.
Storing and Reheating
With any homemade condiment as rich and complexly flavorsome as brisket jam, inevitably some will be leftover after the initial testing rounds. Not to worry – this spread keeps very well sealed in the fridge for about a week.
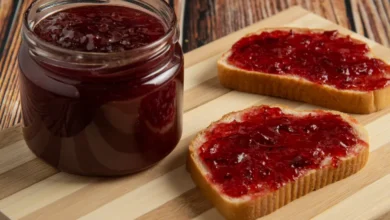
I like to transfer small batches of the cooled jam into clean glass jars before securing their lids tightly and storing in the coldest part of my refrigerator. Should I want a warm serving later in the week, all it takes is a few short bursts in the microwave while stirring between each until softened and warmed to an appealing serving temperature once more. The blended seasoning and meaty essence holds up remarkably well under reheating. And with so many potential uses, it’s likely any remaining jam will be enjoyed long before the expiration date! Proper storing makes this special creation accessible for busy weeknights or future cooking projects anytime.
Conclusion
With its depth of smoky, savory flavor, brisket jam takes simple dishes to new heights. A little effort upfront yields big rewards, as leftovers keep well for enjoying all week. Perfected over time, this recipe promises to become a family favorite handmade condiment. I hope you’ll be inspired to gather the ingredients and get cooking your own batch of brisket bliss.
Frequently Asked Questions (FAQs)
1. What is brisket jam?
Brisket jam is a savory condiment made from chopped or shredded smoked beef brisket simmered with onions, peppers, bacon, vinegar, syrup and seasonings. It has a thick, spreadable texture similar to jam.
2. What type of brisket should I use?
Use a smoked beef brisket flat cut or point cut. The smoked meat provides intense barbecue flavor to the jam. Pastrami brisket would also work well.
3. What else can I use the jam for?
The jam can be used on sandwiches, burgers, hot dogs, toast, crackers, pizza, tacos, cheese boards, stuffed into meat. It adds big flavor to many dishes.
4. How long does it take to cook a brisket?
Cooking time for a full packer brisket varies depending on size, but generally 12–18 hours of low & slow barbecue smoking is needed. Plan to start cooking overnight or very early in the morning.
5. Where does brisket come from?
Brisket comes from the chest area of beef cattle. The flat cut and point cut come from below the shoulder blade of the front leg/arm of the cow.
6. Which cooking method is best for a brisket?
Low and slow barbecue smoking over indirect low heat (225-250F) with wood smoke is considered the best method to properly break down the tough muscle fibers and collagen of the brisket.
Brisket Jam
Course: Appetizers4
servings10
minutes30
minutes160
kcal2 (16 ounces)
cups40
minutesSavory and smoky brisket jam packs Texas barbecue flavors into every rich, fat-coated bite. Brisket, bacon and onions simmer into an unctuous spread to slather sandwiches or top burgers in decadent luxury. With complex mingled tastes of meat and smoke, each lick of this thick condiment transports the eater straight to a sizzling backyard smoker.
Ingredients
- For Brisket Jam:
4 oz smoked brisket, chopped (1/2 pound)
1 large onion, diced
4 jalapeños, roasted and diced
8 slices bacon, cooked and chopped
1/3 cup olive oil
1 1/2 Tbsp red pepper flakes
1/2 cup apple cider vinegar
1/2 cup maple syrup
4 Tbsp brown sugar
1/2 cup coffee
2 Tbsp Worcestershire sauce
Salt and pepper to taste
- For Brisket Jam Burgers:
1 lb ground beef (80/20)
Kosher salt and black pepper
4 brioche hamburger buns
4 slices aged cheddar cheese
1/2 cup Brisket Jam (recipe below)
Mayonnaise
Directions
- For Brisket Jam:
- Place 8 thick-cut bacon slices in a cold 10-inch cast iron skillet.
- Turn heat to medium and allow bacon to slowly render fat, flipping occasionally, for 5-7 minutes. Allow bacon to continue cooking 2-3 more minutes until slightly firm but not crispy. Transfer cooked bacon to paper towels and reserve 2-3 Tbsp bacon fat.
- Place a cast iron grill grate over medium-high heat on the stove.
- Place whole jalapeños on grill and roast, turning occasionally, until skins are blackened, 5-7 minutes. Remove from heat and let cool slightly. Slice off stems and remove blackened skins. Dice roasted jalapeño flesh.
- Cut onion into roughly 1⁄4 inch cubes.
- Chop cooked bacon strips into smaller pieces ranging from crumbs to 1⁄4 inch.
- Heat reserved bacon fat in skillet over medium. Add diced onions and cook, stirring occasionally, until deeply caramelized, 10-12 minutes. Add 1 tsp red pepper flakes and cook 1 more minute.
- Add remaining ingredients to skillet and simmer 10-15 minutes until thickened. Remove from heat and let cool slightly before using.
- For Brisket Jam Burgers:
- Form the ground beef into four equally sized balls, about 1/3 cup each. Place one ball between two pieces of plastic wrap or wax paper. Use a meat mallet or rolling pin to gently flatten it to about 1/2 inch thickness. Season the patty liberally with salt and pepper, pressing gently so seasonings adhere. Transfer to a plate and repeat with remaining balls of meat. Refrigerate patties until ready to grill.
- Preheat the grill to medium-high heat. Clean and oil the grilling grate. Place patties on hot grill and cook for 3-4 minutes without moving them. Flip the patties carefully with a spatula. Continue grilling for another 2-3 minutes, until the internal temperature reaches 150°F when tested with a meat thermometer.
- Remove the patties from the grill once cooked through. Drape one slice of cheese over each patty. Return them to the grill, with the lid closed, to allow the cheese to melt for 1 minute.
- While the cheese melts on the patties, toast the cut sides of the brioche buns directly on the grill for 30 seconds, just until golden brown. Transfer toasted buns to a platter.
- Spread a thin layer of mayonnaise on the bottom half of each bun. Top with a cooked patty, then spread 2-3 tablespoons of brisket jam over the patty.
- Finish with the bun tops. Serve burgers immediately, garnished with your favorite burger toppings if desired. Enjoy!
Notes
- Transfer cooled jam to clean glass jars. This allows for easy portioning and visibility of contents.
- Secure lids on jars tightly. Proper sealing is key for refrigerated storage.
- Store jars in the coldest part of the fridge, such as on a fridge shelf. Cold temperature prolongs shelf life.
- To reheat, use short bursts in the microwave while stirring in between. Gentle microwaving warms jam without altering flavors.
- Reheating brings jam to an appealing serving temperature. Ensure it’s warm enough for sandwiches, burgers, or other uses.

