Wondrous Mini Breakfast Sliders Worth Waking Up For

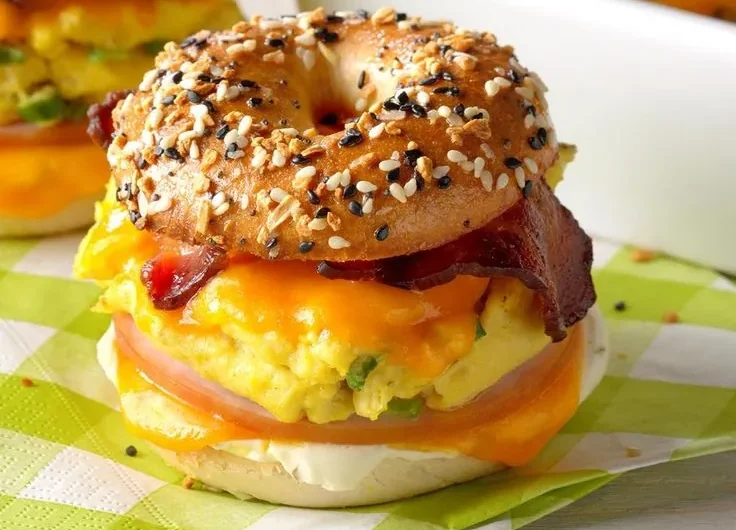
Have you grown tired of the same old, boring breakfasts day after day? I know I sure have. I love finding new flavorful ways to switch things up from my regular ol’ cereals and yogurts in the mornings. Well let me tell you, these Ultimate Breakfast Sliders take all the best parts of a classic breakfast and pair them together in one fun and indulgent handheld package! Using sweet Hawaiian rolls as the base, I stuff them with savory bacon, melted cheese, and a sprinkle of Everything But The Bagel seasoning to really elevate the overall flavors. Each bite is like a party in your mouth with layers of rich fresh ingredients. With flavors that seem to go head-to-head between sweet and savory, these sliders are the perfect way to switch things up from your usual breakfast routine. I promise you’ll be craving them all over again for a fun dinner option, too!
Contents
- Crack Breakfast Sliders
- Reasons to Love Breakfast Sliders
- Notes on Ingredients and Substitutions
- How to Make Breakfast Sliders?
- Helpful Tips And Variations
- Can I Leave Out the Bacon or Sausage?
- Can I Use Shredded Cheese?
- What to Serve with Delicious Breakfast Sliders?
- Make Ahead Instructions
- How To Store Breakfast Sliders With Sausage?
- Frequently Asked Questions (FAQs)
- Easy Breakfast Sliders
Crack Breakfast Sliders
When a recipe title uses the term “crack” as this one does, it’s clear the creator intends to convey that the flavor combination is so addictively delicious, it has the potential to become an instant favorite, or what some may refer to as “crack worthy.” Referring to the dictionary definition, crack here implies a combination of ingredients brought together with “superior excellence or ability.” With cheddar, bacon, and cooling ranch dressing all uniting, it’s easy to see why the name fits. This recipe creator is clearly implying their twist on breakfast sliders is one of superior excellence. And from the mouthwatering list of elements coming together, I’d have to agree – it most definitely earns that label!
Reasons to Love Breakfast Sliders
These sliders really have the best of both worlds, combining elements that are both undeniably sweet and gloriously savory. From the fluffy sweet Hawaiian rolls as the base, to the flavorful savory breakfast sausage and creamy fluffy eggs packed inside paired with salty hits of sharp cheese, each bite is absolutely hearty and seriously satisfying. And have you tried them when the rolls are topped with a buttery maple butter glaze? The blend of flavors is simply irresistible.
A major perk of these breakfast sliders is that they are incredibly make-ahead friendly. You can fully assemble the sliders up to 24 hours in advance, cover and store in the fridge until ready to pop in the oven or toaster oven for quick baking come breakfast time. This makes them ideal for busy holiday weekends or whenever you need to provide a hot breakfast for guests. No rushing around at the last minute needed!
No utensils required with these ultimate finger foods, either! Simply pick up with your hands to enjoy each perfect little handheld serving. This encourages more mingling and socializing at your party or tailgating bash instead of everyone sitting fixed at a table.
Last but not least, these crowd-pleasing breakfast sandwiches are guaranteed to be a big hit with everyone. With their intoxicating savory-sweet aroma and flavors in each irresistible roll, they always seem to quickly disappear as the first to go at any kind of gathering. A sure sign they are a breakfast success!
Notes on Ingredients and Substitutions
- While the recipe calls for using Hawaiian Sweet Rolls, feel free to use whatever type of slider bun you prefer. Any soft sweet roll variety will certainly work fine in place.
- For easy assembly and baking, the eggs are meant to be used in their layered state when scrambled, or you can choose to use them fully baked inside the roll instead if you want to skip that step. Another helpful cooking hack could be to bake the rolls first with the filling ingredients inside for one-bite breakfast sandwiches.
- As for the breakfast sausage, I highly recommend using homemade sausage for maximum flavor instead of Italian sausage. But you can certainly omit the meat altogether or sub in alternatives like ham, baked bacon or Canadian bacon in its place.
- When it comes to the cheese, try pairing flavors that will give a nice contrast, like melty sharp cheddar against the sweet egg and maple components. But feel free to use Swiss, Provolone or Pepper jack cheese instead to your taste.
- And if you prefer things to be a less sweet, simply use the same amount of soft butter and reduce the quantity of maple syrup brushed on top accordingly.
How to Make Breakfast Sliders?
Making these super easy breakfast sandwiches is a breeze with just a few simple ingredients. Start by cooking some bacon slices in a large skillet over medium-high heat until crispy. Drain on a paper towel to remove any excess grease.
For the eggs, I find it best to prepare them right in the same pan used for the bacon. A helpful trick I learned is to bake the eggs rather than frying them, which makes the whole process of assembling the sandwiches much easier. Just whisk the eggs with a splash of cream and your favorite seasonings, then pour the mixture into a lined baking sheet fitted with parchment paper. Bake sheet pan breakfast sliders at 350°F until the eggs are set into a uniform and fluffy layer that will perfectly fit inside each slider bun.
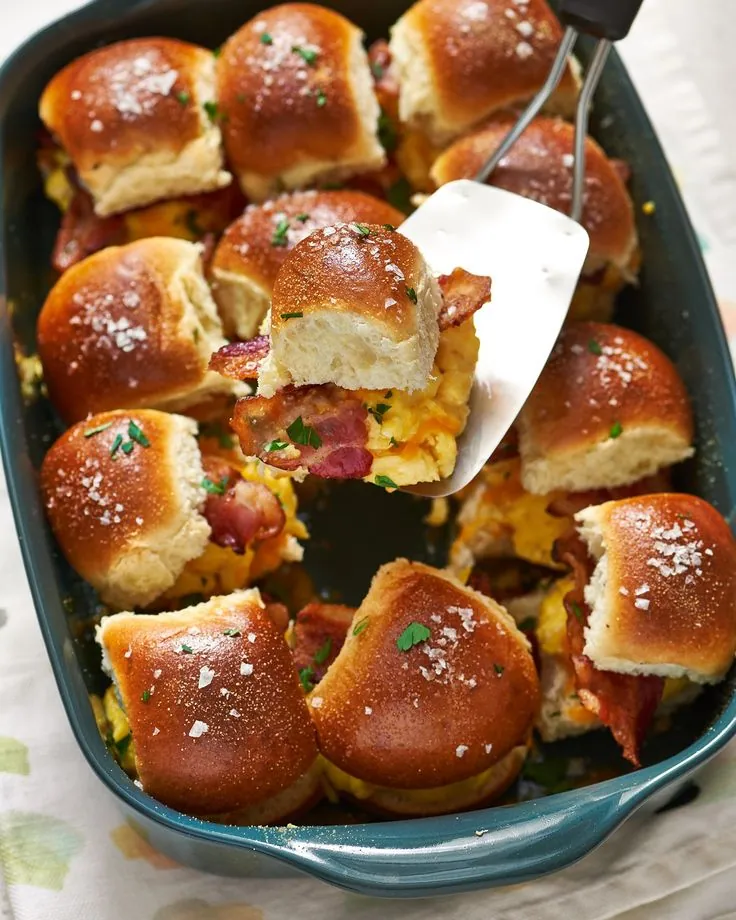
Now for the easy assembly. Layer the prepared ingredients into the slider buns. Start with a smear of the eggy layer on the bottom half of each bun. Top with crumbled cooked breakfast sausage, a slice of sliced cheese, and a crispy piece of cooked bacon. Add another layer of the eggs if desired. Place the top half of each Hawaiian roll in place. I prefer using my own homemade breakfast sausage and melty sharp cheddar cheese, but use what you like best!
Next, brush the assembled sliders generously with the blended melted butter and maple syrup for a sweet addition. A final sprinkle of Everything but the bagel seasoning on the tops finishes them off nicely.
Finally, bake the fully assembled sliders for 10–15 minutes at 350°F until the buns are toasted, and the cheese is melted. Enjoy warm straight from the oven, cutting each slider in half if desired for easy serving. No need to dip – the maple syrup has been lovingly brushed on already. But provide extra on the side too for anyone wanting more of that indulgent sweetness with each savory bite. You can bet these sandwiches will disappear quickly!

Helpful Tips And Variations
- For those watching calories or prefer a different flavor, you can easily substitute regular bacon for lower-calorie turkey bacon. Just cook it in a foil-lined baking pan at 400°F for 20–25 minutes until crispy.
- The classic Hawaiian rolls called for in many recipes work great, but feel free to use whatever package of slider buns you have on hand as a replacement.
- When it comes to the cheese, while pre-shredded cheese is convenient, I highly recommend freshly grating your own cheddar cheese. It melts creamier and gives the finished sliders a nicer flavor. But store bought is fine too if needed.
- For softer rolls, simply cover the baking pan tightly with foil while baking to keep them nice and pillowy.
- Be cautious not to overcook the eggs when initially making the filling, as they will bake for another 10–15 minutes after assembly.
- Assemble sliders on mini buns or English muffins with sliced avocado, tempeh bacon or sautéed mushrooms. Top with microgreens and a drizzle of vegan ranch for a satisfying meatless vegetarian breakfast sliders.
- Store any leftovers in an airtight container in the refrigerator for up to 3–4 days.
Can I Leave Out the Bacon or Sausage?
Certainly, you can leave out the breakfast sausage or bacon if you’d like. However, I’d recommend at least doubling up on another element, so the sliders don’t end up tasting too bland. If you aren’t into or don’t really dig on pork products, instead of removing them altogether you could add in extra eggs, another cheese like ham or spinach for more flavor.
While the salty bacon or sausage really enhance the savory aspect, these sandwiches would still be plenty satisfying without one or the other. Just be sure not to skip both meat options, as they do contribute much to the balance of tastes. But feel free to get creative with your filling plan however you’d prefer!
RELATED: Breakfast Pig Shots
Can I Use Shredded Cheese?
While breakfast slider recipes most commonly call for pre-sliced cheese to top the filling, using shredded cheese can also work! Here are a few tips when going that route:
- Shredded cheese will certainly work in place of slices for this recipe. The finer strands may just require a bit more attention during baking.
- When topping open-faced sliders, gently encourage the shredded cheese to the very edges so it melts beautifully all over each roll.
- For easier assembly, continuing to buy pre-sliced or block cheese to layer under the cooked sausage and bacon can help prevent a messy cheese pull when the sandwiches are picked up.
- Come baking time, closely monitor the tops so the shredded cheese doesn’t burn before melting smoothly. You will earn a gorgeous, oozy finish perfect for Instagram!
So in short, feel free to use shredded cheese if that’s what you have on hand. It simply may need a touch more TLC while assembling and baking the sliders to perfection.
What to Serve with Delicious Breakfast Sliders?
While the sweet rolls and savory fillings like bacon and cheddar already provide plenty of delicious flavor contrast, these sliders truly shine when accompanied by some tasty complements. Due to the sweetness baked into the buns, a favorite way to enjoy them is to dip each gooey bite into a pool of rich maple syrup. YUM!


Some classic breakfast sides that would make the sliders feel extra special are creamy baked beans or crispy roasted potatoes. But don’t be afraid to mix it up – try serving them with favorite hearty dishes like Mississippi Pot Roast too for a fun breakfast-for-dinner or weekend lunch twist.
Make Ahead Instructions
These breakfast sliders with maple syrup are super convenient to fully prepare in advance! I recommend assembling the sandwiches as directed up until the point of brushing the sweet maple glaze over the tops of the buns. Then hold off on that finishing step. Instead, cover the filled and assembled sliders tightly in a baking dish with plastic wrap then foil. Refrigerate for up to 24 hours before baking day.
When ready to serve, remove the sliders from the refrigerator and allow sitting at room temperature for 30 minutes uncovered to take the chill off before baking. Then simply remove the plastic wrap and foil, brush generously with the maple butter glaze as directed, and continue on with the baking instructions as usual.
How To Store Breakfast Sliders With Sausage?
The breakfast sliders really shine their best when served piping hot straight from the oven, so it’s recommended to enjoy them as a freshly baked treat. If any happen to remain, they can safely be held at room temperature for no more than two hours for optimal quality and texture. After that window, be sure to refrigerate leftovers by securely stowing them away in an airtight container where they will last up to 3 days. For even longer storage, the freezer is a great option – simply freeze bundled sliders for approximately 3 months. When the time comes to reheat, gently warming through either uncovered in a 300 degree F oven covered with foil or within an air fryer brings them right back to that just baked state.
Conclusion
In conclusion, breakfast sliders are a quick and tasty way to start the day. Their petite size makes them perfectly portable for busy mornings. Best of all, as demonstrated by the variety of vegetarian options presented, they accommodate any diet or lifestyle. Whether you choose an egg and cheese combo or get creative with leftovers, these sliders offer an easy handheld solution to fuel your mornings with smiles. Their simplicity and flexibility ensure breakfast, and happiness, is never far out of reach.
Frequently Asked Questions (FAQs)
1. Why are they called sliders?
The name “sliders” originates from the small, sandwich-sized proportions meant for easy “sliding” or popping into one’s mouth in just a few bites. They’re a portable and fun take on traditional sandwiches.
2. Can breakfast sliders be frozen?
Yes, breakfast sliders do freeze well for long term storage. To freeze them, securely wrap each slider individually, then place in an airtight freezer bag or container. They will maintain quality in the freezer for 3 months. Just be sure to thaw fully in the refrigerator before reheating.
3. How do you reheat frozen breakfast sliders?
The best ways to reheat frozen sliders are to place them on a baking sheet in a preheated 300°F oven until warmed through, about 10–15 minutes. You can quickly reheat individual sliders in an air fryer on high for 5–7 minutes until they are hot and crisp. Rewarming brings them back to a just-baked texture.
4. What can I serve with breakfast sliders?
Delicious side pairings include baked beans, roasted potatoes, fresh fruit salad or yogurt. You can also accompany the sliders with traditional breakfast meats and cheeses to round out the meal. Maple syrup is a sweet favorite for dipping the tasty sandwiches.
5. Can I double this breakfast sliders recipe?
Yes, you can easily double or even triple this recipe to feed a larger crowd. Just be sure to use a bigger baking sheet to accommodate the sliders, or bake them in batches if necessary. All the components scale up well for making a larger quantity.
6. Why are my sliders soggy?
One typically experiences soggy sliders due to one of these reasons: overfilling the buns, which causes ingredients to be squeezed out; using buns that cannot withstand moisture; allowing unfinished sliders to cool to room temperature before serving or storing them; or reheating them improperly in the microwave. Using less filling, sturdier buns, and avoiding long holding times can help prevent sogginess.
7. How do you reheat Hawaiian sliders?
The best way to reheat Hawaiian sliders is to place them on a baking sheet and warm them in a 300°F oven until heated through, about 10–15 minutes. This gentle method preserves the soft buns without drying them out. An alternative is reheating individual sliders in an air fryer set to 350°F for 5–7 minutes.
8. What is slider sauce made of?
A classic slider sauce is a fusion of tangy and sweet flavors. Common ingredients include mayonnaise, ketchup or BBQ sauce, honey or brown sugar, apple cider vinegar, mustard, Worcestershire sauce, minced shallots or onion, and herbs like dill. The sauce balances the richness of the sliders for dipping. Variations include adding horseradish, Sriracha or ranch dressing mix.
Easy Breakfast Sliders
Course: Appetizers12
servings15
minutes35
minutes146
kcal50
minutesIndulge in these portable breakfast sandwiches filled with egg, cheese and your choice of meat. Full of protein and flavor, Breakfast Sliders are the perfect grab-and-go breakfast or snack. Easy to make and even easier to eat, these handheld breakfast treats will start your day off right.
Ingredients
12 Hawaiian slider buns (1 package)
8 large eggs
1⁄4 cup cream or milk
1⁄2 teaspoon kosher salt
1⁄2 pound breakfast sausage
Everything but the bagel seasoning
9 pieces of cooked bacon
8-10 slices sharp cheddar cheese
2 tablespoons unsalted butter melted
1⁄2 tablespoon maple syrup
Directions
- Preheat oven to 350℉. Line a 7×11 pan with parchment paper.
- Cook bacon slices in a large skillet over medium-high heat until crispy. Drain on a paper towel to remove excess grease. Set aside.
- Whisk eggs with cream/milk and seasonings in a bowl. Pour mixture into a lightly greased baking sheet lined with parchment paper. Bake at 350°F until eggs are set and fluffy.
- Slice Hawaiian slider buns open but keep halves attached. Spread eggy layer inside bottom buns.
- Top eggs with crumbled cooked breakfast sausage, a sliced cheese slice and a piece of cooked bacon. Add another layer of eggs if desired. Replace top buns.
- Brush assembled sliders generously with blended melted butter and maple syrup. Sprinkle tops with Everything but the Bagel seasoning.
- Bake sliders at 350°F for 10-15 minutes until buns are toasted and cheese is melted.
- Enjoy sliders warm from the oven, cutting each in half if desired. Provide extra maple syrup on the side.
Notes
- Hawaiian slider buns are recommended but any soft sweet roll can be used as a substitute. Turkey bacon can be substituted for regular bacon to reduce calories. Bake at 400°F for 20-25 minutes until crispy. The rolls can also be baked first with fillings inside for one-bite sandwiches.
- Scrambled eggs are meant to be used as a spread inside the buns, but fully baked eggs can be used instead to skip that step.
- Homemade breakfast sausage is highly recommended for maximum flavor over Italian sausage. Meat can also be omitted or substituted for alternatives like ham, bacon or Canadian bacon.
- To make it less sweet, reduce the maple syrup brushed on top while still using the same amount of butter.
- Cover baking pan with foil to keep rolls softer while baking.
- Don’t overcook eggs for filling as they bake more after assembly.
- The sliders can be fully assembled in advance up until brushing on the maple glaze. After assembly, tightly cover the sliders in a baking dish with plastic wrap then foil. Refrigerate the covered sliders for up to 24 hours before baking day. When ready to bake, remove sliders from fridge and let sit at room temp for 30 minutes uncovered. Remove plastic and foil, brush on maple glaze, then continue with regular baking instructions.
- They can be held at room temperature for no more than 2 hours for optimal quality. Refrigerate leftovers in an airtight container for up to 3 days. Sliders can also be frozen for approximately 3 months for longer storage. To reheat, warm uncovered at 300°F in the oven or in an air fryer until heated through.
