Red Velvet Lava Cakes: Guide to Sweet Treat Recipe
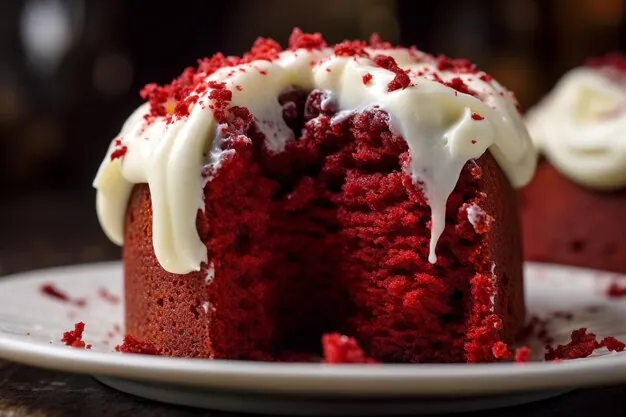
There is no denying that Red Velvet is one of the most popular cake flavors that catches people’s eye with its vibrant crimson hue. The unique, rich cocoa and buttermilk taste truly hits all the right notes. When it comes to red velvet desserts, it is really hard to resist and satisfy your craving quite like lava cakes.
Red velvet molten lava cake recipe is a tremendously rewarding dessert that satisfy your sweet tooth on another level. The molten chocolate center bursting forth when you first cut into the cake is a dramatic surprise that gives an intense pleasure. The first time I had a bit of red velvet lava cake, I was absolutely blown away by the contrasting textures. The light, fluffy and utterly indulgent tender cake exterior would slowly give way and gush with the melted chocolate in your mouth – it truly was heaven with each subsequent bite. The tangy buttermilk, deep chocolate and hint of cream cheese were blended to perfection in every way. I couldn’t help but devour one after another of the cute little cakes that were so tempting and yummy! It was really hard to save one for later.
Contents
- What is a Lava Cake?
- Red Velvet Lava Cakes
- Ingredients
- Directions
- Red Velvet Lava Cake With Cream Cheese Filling
- How to Tell When it is Done?
- How to Flip a Molten Lava Cake?
- Can You Prepare Ahead of Time?
- Variations
- Frequently Asked Questions (FAQs)
- What is the difference between molten lava cake and lava cake?
- What is lava cake made of?
- Why red velvet cake is so expensive?
- What is red velvet flavor made of?
- What is the real Flavor of red velvet cake?
- Is red velvet chocolate or not?
- How long do you bake lava cakes?
- Can lava cakes be frozen?
- Is red velvet just vanilla?
What is a Lava Cake?
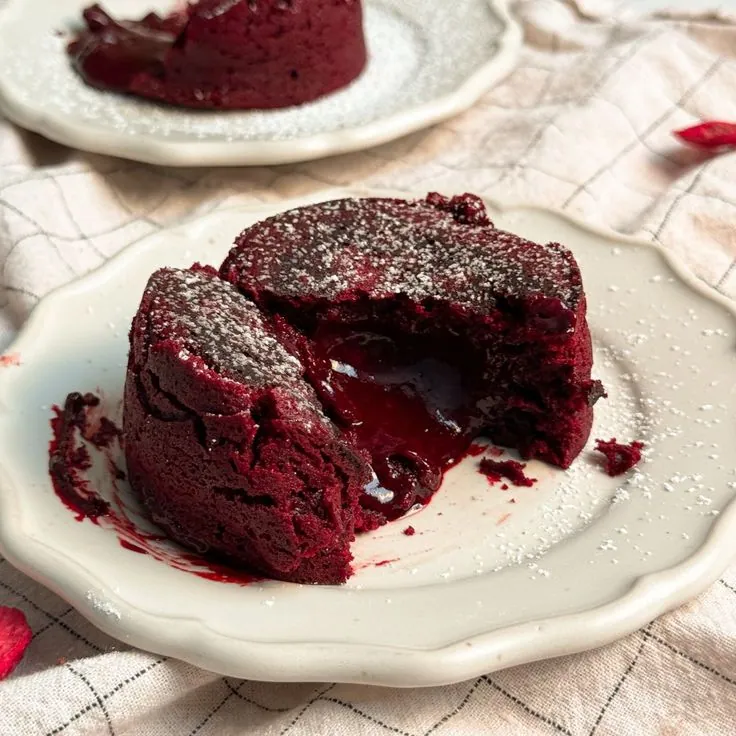
A key aspect of a lava cake is that it is a small, individually portioned cake where the center remains raw and comes out like lava when you dig your utensil into it. The wonderful surprise is getting that molten chocolate center bursting forth from the tender cake exterior with each bite.

Why You’ll Love This Recipe?
- These Red Velvet Lava Cakes are the ultimate showstopper dessert. They are perfect for the grand finale of a special occasion when you really want to impress and start true conversations.
- Every cake hides the secret molten center, wowing your guests when you cut and reveal the delightful, chocolaty surprise. They are absolutely Instagram-worthy!
- Feel free to be creative – change up the type of chocolate used or add a splash of a different flavored liqueur to the cake batter or molten center for your own unique twist.
- With their rich and decadent but intimate serving size, these are the ideal cozy dinner for two – perfect for date night and romance!
- Short on time? No problem – you can prepare the chocolate centers in advance, keeping them chilled and ready to just assemble and bake fresh cakes when needed. Make-ahead magic!
Perks of Red Velvet Lava Cakes
- The Red Velvet Lava Cake gives a nod to the classic Southern charm of the red velvet cake recipe, blending the traditional flavors we all adore into an all-American favorite dessert that is a love letter to comfort food enthusiasts everywhere. They will love the good surprise that’s inside.
- Baking the perfect Red Velvet Lava Cake truly requires an art – it’s challenging to achieve the ideal balance between a tender cake exterior and gooey, molten center. The precise timing and precision make these darlings so worth it.
- While this recipe isn’t vegan or gluten-free and does contain dairy products and eggs, it is completely meat-free and suitable for those with specific dairy allergies who can tolerate small amounts of milk or butter. Calling all dessert-loving vegetarians!
- Imagine experiencing the iconic, mild cocoa flavor of a traditional red velvet cake paired with the decadent, rich surprise of melted chocolate in the heart of each dessert treat. A taste experience for your taste buds like no other.
- You don’t need to be a professional pastry chef to make this luscious treat – just a bit of experience in the kitchen. It’s helpful to understand the process as it involves multiple steps that require careful attention, especially when it comes to the baking time and the lava center’s preparation.
Is It Safe To Eat Lava Cakes?
Are you wondering if it’s safe to eat these treats even though the centers remain a bit raw? Yes – there is no need to be concerned about safely consuming the raw egg or flour. The main concern regarding egg and flour safety when consuming foods made with raw ingredients is bacteria growth.
It’s important to heat-treat the flour to a minimum of 165ºF or 74ºC to kill off any potential bacteria that may reside in the wheat from the fields. And cooking the eggs to at least 165ºF or 74ºC eliminates the risk there as well. But when you bake these in a ramekin or cupcake pan at a high heat and temperature, the outside forms a firm vessel that quickly creates an environment safe for the raw batter on the inside to stay at a sanitary internal temperature. Just test the internal temperature of a few cakes before serving to be sure.
Tips to Make The Perfect Molten Lava Cakes
- Generously grease the ramekins with butter, so the cakes don’t stick and come out easily in one piece rather than spill over the sides.
- Use gel food color for a more concentrated color pigment and stronger red hue. You don’t want to leave out the food coloring, or it won’t come out red.
- Baking time is tricky – over-bake by just a few seconds, and they will be ruined. Make sure the oven is properly preheated and well-calibrated to the correct temperature. The top and edges of the cake should feel set, but the center still have a bit of a wobble or shake in the ramekin. If in doubt, lean towards under-baking.
- Bake one cake first as a test before the rest to check it. This recipe isn’t helpful if making a larger batch all at once, since you want to adjust and get the baking time exactly right.
- For the chocolate, you can use sweeter milk chocolate or bittersweet for a bit stronger, richer flavor.
- Serve the cakes straight away, once cooled in the ramekins for just a minute so the hot molten centers are pronounced.
Red Velvet Lava Cakes
Course: DessertCuisine: American2
cakes15
minutes10
minutes380
kcal25
minutesRed velvet lava cakes combine the flavors of classic red velvet cake with the molten centers of lava cakes. These decadent treats deliver layers of chocolate and red velvet taste in every molten bite.
Ingredients
¼ cup butter (56g)
100g semi sweet chocolate, chopped
1 large egg
1-2 tbsp granulated sugar
Pinch of salt
¼ tsp vanilla
1 tbsp baking cocoa
2 tbsp all-purpose flour
1-2 teaspoon red gel food color
Butter to coat the ramekins
1 tbsp sour cream
2 tbsp powdered sugar
1 cup heavy cream
Directions
- To start, pre-heat the oven to 450F degrees if using a conventional oven. Then prepare two 6 oz ramekins by generously brushing some butter all around the inside of them.
- To make the whipped cream, add the sour cream and powdered sugar to a bowl. Using either a stand-up mixer with the whisk attachment or a hand-mixer, beat the ingredients until smooth. Then pour in the heavy cream and continue whipping on medium speed until medium peaks form, taking approximately 2 minutes.
- For the chocolate centers, microwave the chocolate and butter together in 20-second increments, stirring between each until melted and combined. Alternatively, you can stove top melt in a small saucepan over inches of water in a heatproof bowl, turning the heat to medium-high and adding the chocolate and butter. Once melted and mixed, then remove from the heat and set aside.
- In a medium bowl, whisk together the sugar, cocoa powder, and a pinch of salt. Add the eggs and vanilla then using an electric hand mixer, beat on high for 2–3 minutes until light, foamy, and the mixture has almost tripled in volume. Pour in the chocolate mixture and gently whisk just until combined.
- Sift the flour, then use a rubber spatula to gently fold it into the wet ingredients, taking care not to overmix. Add a few drops of red food color to adjust the shade to your desired darkness – you want a rich pay-off but not strong color. Divide the batter evenly between the two ramekins.
- Bake for approx 10–11 minutes until the edges are set but the center still appears molten and wobbles gently when the ramekins are moved. Halfway through, rotate the ramekins for even baking over the final 7 minutes.
- When ready to serve, carefully run a sharp knife alongside the outside edges of the lava cakes and then invert them onto individual serving plates. Top each cake with a scoop of the delicious whipped cream, sprinkling a small pinch of flaky sea salt overtop to balance the sweetness. Enjoy!
Red Velvet Lava Cake With Cream Cheese Filling
In a large mixing bowl, sift the powdered sugar and add the cream cheese, beating well until blended smooth. Turn out onto a large piece of plastic wrap and form into a thick log about the size of a hot dog. Refrigerate the cream cheese mixture wrapped in the plastic wrap to firm. Once firm, roll up the plastic wrap to keep the 11⁄2 inch thick cream cheese log intact, and place the entire thing in the freezer to freeze overnight until frozen through.
Follow the above red velvet lava cake recipe before baking (point 6). Now remove the frozen cream cheese log from the freezer and slice it into thick 2 inch pieces. Slice the frozen cream cheese and add a piece to the center of each cake batter-filled ramekin. Cover the cream cheese entirely with the remaining red velvet batter.
RELATED: Easy Biscoff Tiramisu
How to Tell When it is Done?
Determining when the lava cakes are perfectly done in the oven is crucial for lava baking success. The cake is ready when the edges are cooked through, but the center has risen up slightly and still appears a little puffy. It will be soft to lightly springy on top, but the center should not be fully jiggly.
Before removing the cakes from the oven, it’s a good idea to double-check the doneness by inserting a toothpick or skewer into the sides of each cake. It should come back with just a few moist crumbs on it, without any sign of undercooked batter. The very center may still seem a touch wet but should not be fully raw.
How to Flip a Molten Lava Cake?
The hardest part of making these lava cakes is that they can definitely have their fair share of messy, molten disasters if not handled properly. The moment of truth that truly makes or breaks the recipe is this crucial flipping guide.
Once fully removed from the oven, allow the lava cakes to rest still inside their ramekins for 2–3 minutes. Then place a small serving plate on top of one ramekin and quickly flip over, using one hand on the bottom plate and protecting your other hand with an oven mitt. Slowly pull the ramekin straight up and away – voila, you’ll have a perfect, still steaming lava cake!
If for some reason a flip doesn’t go perfectly and chunks fall out, do not bother. Simply dust with a light layer of powdered sugar and place a hefty scoop of vanilla ice cream alongside instead. Flavor is what truly matters!
Can You Prepare Ahead of Time?
Yes, these lava cakes are very prep-ahead friendly! If you know you’ll want to surprise your loved ones with this special dessert but are busy, you can easily refrigerate the uncooked batter in the ramekins for up to 24 hours beforehand.
I highly recommend taking this extra step to place a circle of parchment paper that has been cut to fit the size of the bottom of each ramekin, spraying with a non-stick spray to ensure the bottoms don’t stick once they sat in the oven. Then cover loosely with plastic wrap and refrigerate until ready to bake.
Alternatively, you can also make the batter in advance by mixing it all in a large mixing bowl then sealing with a layer of plastic wrap and refrigerating for up to 2 days. Once you’re ready to cook the cakes, allow the batter to sit out for 30 minutes to come back up to room temperature before baking as directed.
Variations
- Use white chocolate instead of semi-sweet, and increase the cocoa powder while reducing the sugar.
- Add a chocolate truffle to the center for an even more dramatic, molten interior. Use dark, milk or white chocolate.
- Add a chilled ganache scoop to the middle of each cake.
- Cover the cakes with cream cheese frosting.
- Remove the red food color – you’ll still have incredible chocolate molten lava cakes.
Final Words
Red velvet lava cakes are a decadent treat that blend the moist texture of lava cakes with the distinctive flavor of red velvet batter. With a molten chocolate center surrounded by red cake, each bite delivers a delicious surprise. Mastering the short bake time ensures a melt-in-your-mouth experience. A perfect blend of tastes and textures awaits those willing to try this showstopping dessert.
———————————
Frequently Asked Questions (FAQs)
What is the difference between molten lava cake and lava cake?
The main difference is that molten lava cakes have a liquid or semi-liquid center when served, while regular lava cakes are cooked through but remain moist inside. Molten lava cakes rely on a short baking time to keep the center runny like molten chocolate or cheese.
What is lava cake made of?
The basic ingredients in a lava cake are chocolate, butter, eggs, sugar, and flour. Dark chocolate or cocoa powder provide the chocolate flavor. Melted butter and eggs make it moist and rich. Sugar sweetens it. Flour acts as a binder. Variations may add ingredients like vanilla, salt, coffee, liqueurs, etc.
Why red velvet cake is so expensive?
Red velvet cake can be more expensive due to the ingredients needed to produce its distinctive color and flavor. The main culprit is the red food coloring, which usually contains cochineal extract from insects. Organic food coloring options are also costly. Additionally, quality cocoa, buttermilk, cream cheese frosting, and other specialty ingredients drive up the price.
What is red velvet flavor made of?
The key to red velvet flavor is the combination of cocoa powder, vinegar or buttermilk, and vanilla extract. Cocoa powder contributes chocolate notes without making it a chocolate cake. The acid from vinegar or buttermilk reacts with the cocoa to turn the cake red and enhance the flavor. Vanilla enhances and rounds out the flavor profile.
What is the real Flavor of red velvet cake?
The real flavor of red velvet cake is a subtle combination of vanilla and cocoa. Despite its deep red hue, it does not contain cherry, raspberry or other fruit flavors. The acid and cocoa create more of an earthy, chocolate undertone rather than a strong chocolate flavor. It has a lighter, richer taste than traditional chocolate cake.
Is red velvet chocolate or not?
While red velvet cake contains cocoa powder, making it inherently chocolaty, it is not traditionally considered a “chocolate” cake. Cocoa provides depth and complexity without a heavy chocolate taste. The acid and vanilla contribute more distinctive flavors, making red velvet unique compared to chocolate cake. So while some chocolate notes exist, red velvet has its own characteristic flavor profile.
How long do you bake lava cakes?
The typical baking time for lava cakes is 8–12 minutes. It depends on the size of the ramekins or cups used. Check smaller ramekins at 8 minutes and larger ones at 12 minutes. They are done when the edges are set, but the center still jiggles slightly when shaken. Taking them out a minute early is better than over-baking, which ruins the molten interior. Proper timing is critical for lava cake success.
Can lava cakes be frozen?
Yes, lava cakes can be frozen before baking for future enjoyment. To freeze unbaked lava cakes:
- Prepare the batter as usual and pour into greased ramekins.
- Cover each ramekin tightly with plastic wrap or foil.
- Freeze solid, at least 4 hours or overnight.
- To bake, uncover the ramekins and bake from frozen for 10–12 minutes longer than usual, until the edges are set.
This works well for batch baking. Just be sure to cool fully before stacking in the freezer container. You can also freeze baked lava cakes, but the molten texture may be compromised.
Is red velvet just vanilla?
No, red velvet cake is not just a vanilla cake. While it does contain vanilla, its distinct flavor comes from cocoa powder and acid (usually buttermilk or vinegar). Vanilla plays a supporting role by rounding out cocoa flavors and tempering some of the acidity. But red velvet would not taste the same without cocoa contributing chocolate/coffee notes. The acid and cocoa reaction is what creates the characteristic flavor unique from plain vanilla. So while vanilla is an ingredient, red velvet has its own flavor profile separate from just vanilla cake. Cocoa, acid and vanilla are what give it its signature taste.

